The Project: Tissue Paper Flowers

The Cost: 5.00-8.00$ (This will depend on how many flowers you need to make. I needed 5 packages which I got from the dollar store and I already had wire so it didnt cost me anything but if you needed to buy it, it usually runs about 3$)
The Story:
While looking for the takeout boxes, I came across a picture of a cute idea which included flowers on top of regular square boxes. Since I wasnt using regular boxes, I figured I could still use the ones I had, which I did, but instead of real flowers, because that would be too expensive, I chose to make tissue paper flowers which I had made before as a seperate craft. This turned out to be a great inexpensive way of creating flowers and the best part is, you can do this with anything. They can be napkin holders, set on top of boxes, placed in a vase, attached to a bobby pin to make a cute head piece, etc..And the best part, its fast to make and you can use any colors!
First Things First:
1. Pick your flower color. We chose plum.
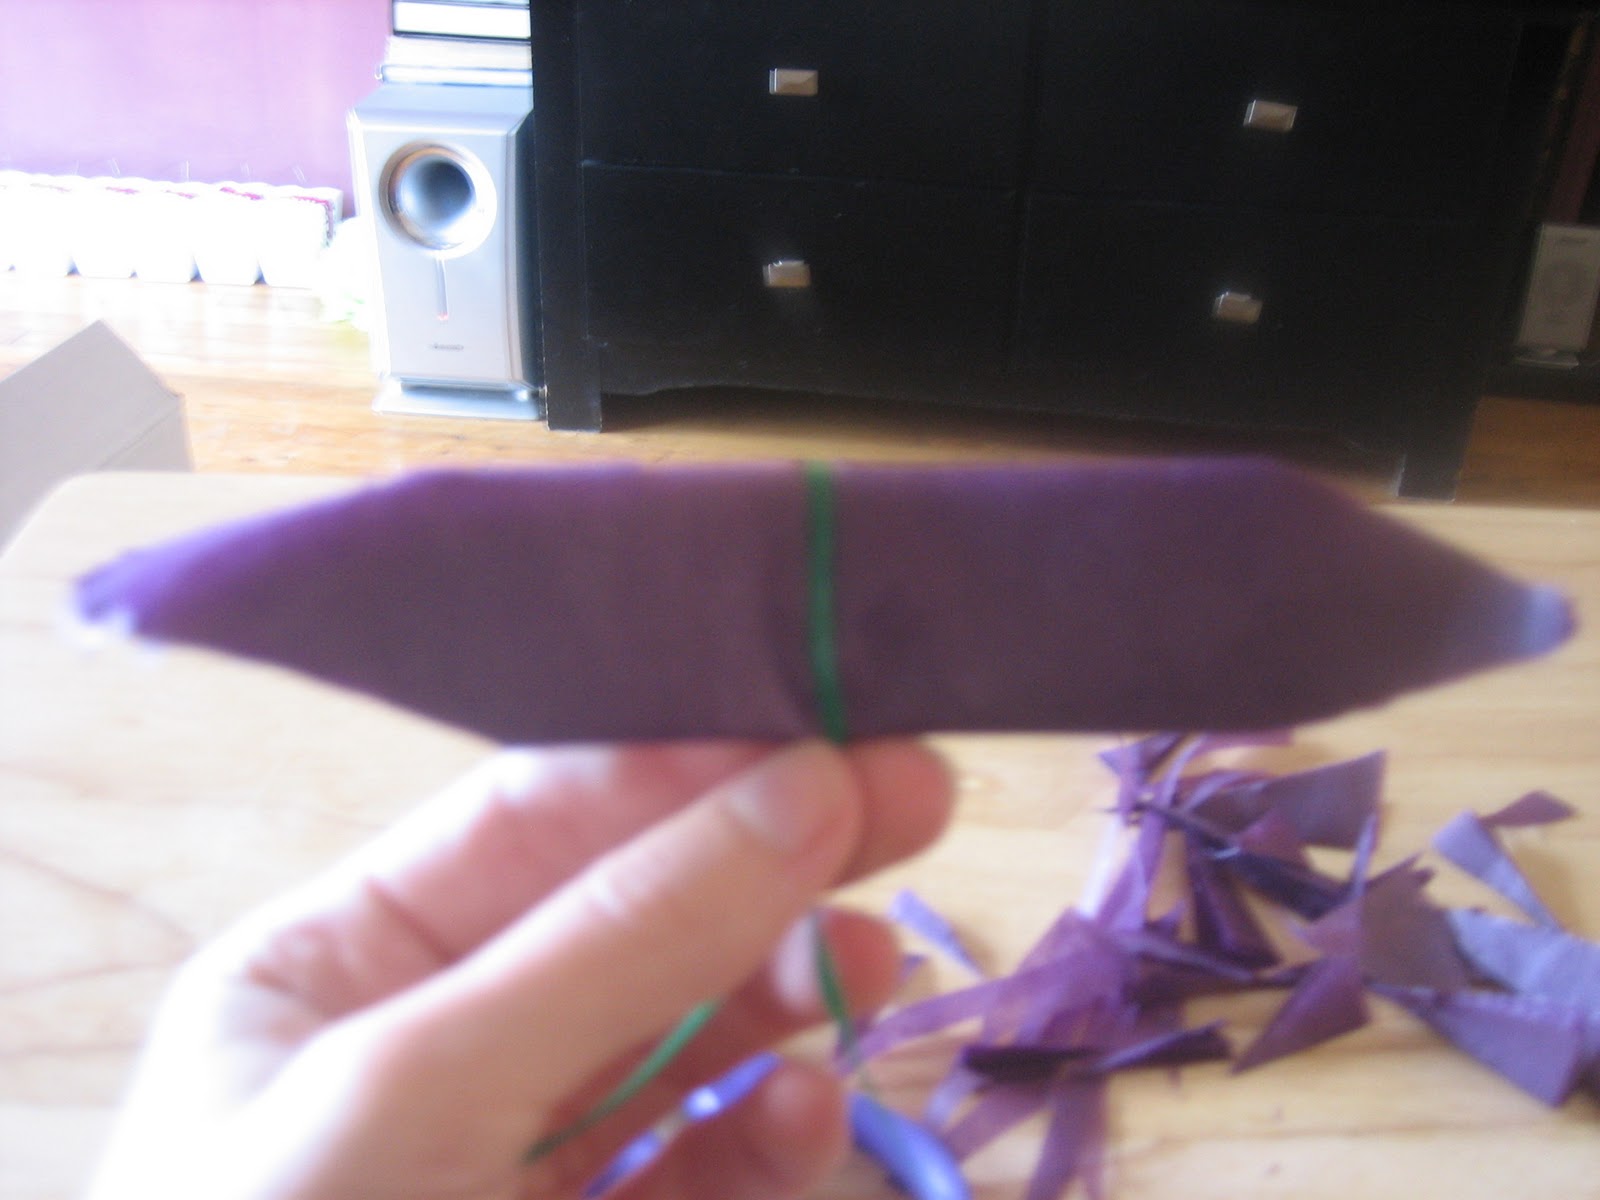
2. Get fishing wire or those twisty tie things
3. Decide how big you want the flower. The standard sizes I found to be appealing to the eye but still easy to work with were: 4x8, 5x10, 6x12 (basically a 1:2 ratio) Any smaller than 4x8 and your looking at a more time consuming project because its a pain to try to pull apart all the petals, trust me, I know! :-( lol.
What You Will Need:
1. Tissue paper
2. fishing wire or twisty ties
3. Patience- These can take awhile to do but when you get the hang of it, it goes pretty fast. I do them while watching TV so its not as boring.lol..Or recruit a friend like I did to help do the first part while you do the second part
Step by Step Directions:
1. After picking your size, I suggest cutting all your tissue paper all at once. Once you seperate the sheets you create more work for yourself.
2. Cut to your desired size.

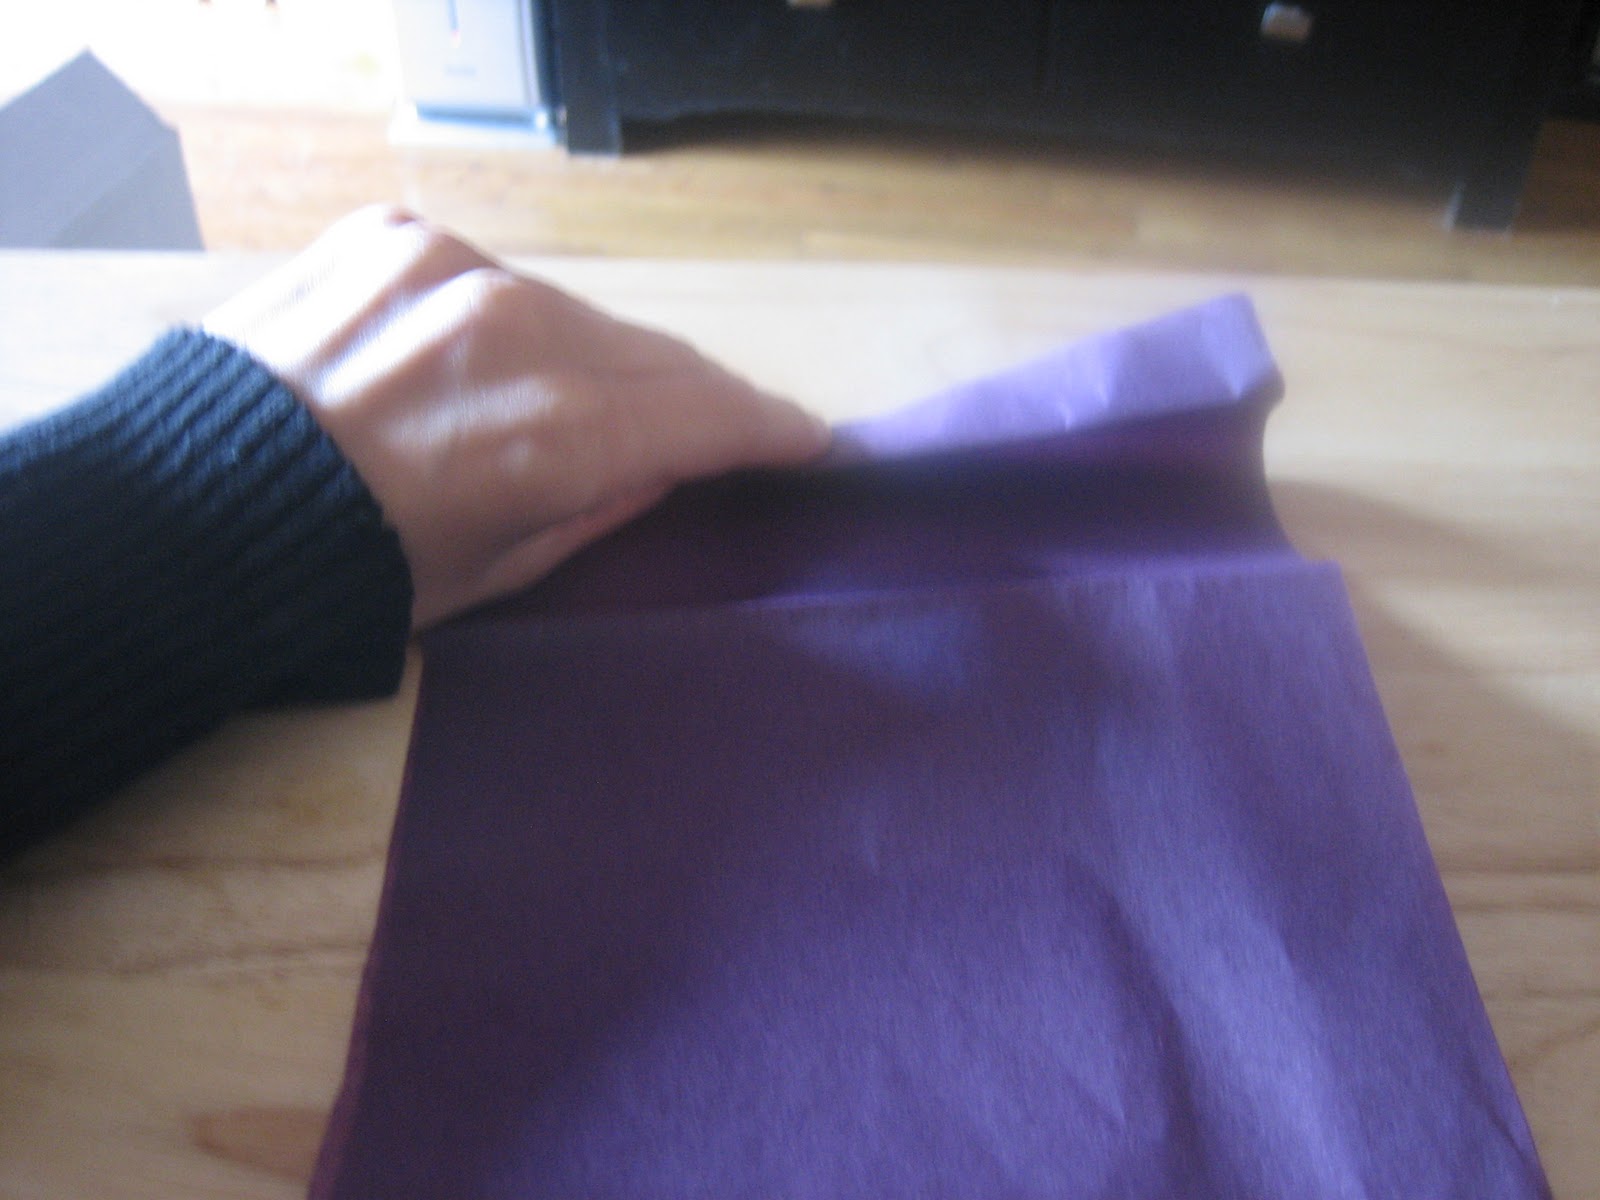
4. Make 1/4 of an inch folds in an accordian style.


7. After you make as many as you need its time to cut off the edges. You can cut in to fashions: a 'V' cut or a 'C' cut. I chose the V cut.

9. Begin on one side of the accordian fold and begin to peel back the first layer. Be sure to pull it as far up as you can without ripping the paper which is easy to do. I ripped alot!
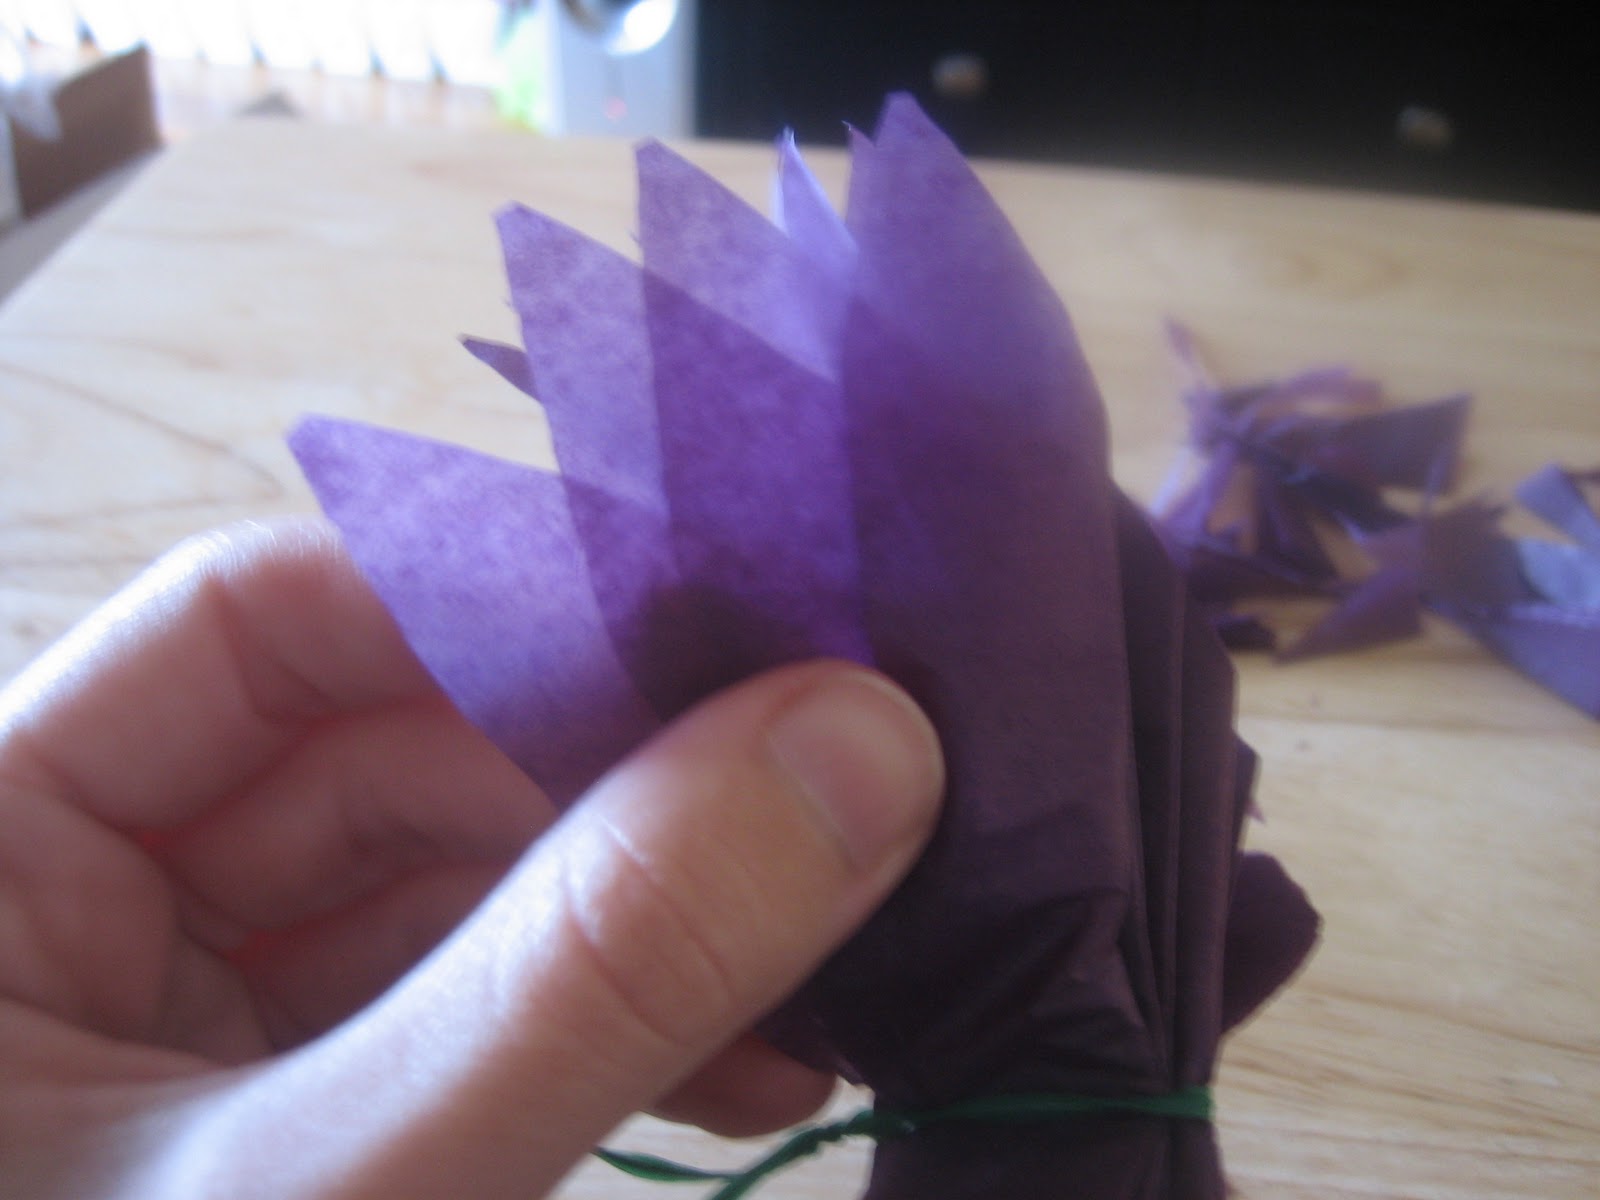


11. The third layer
12. The last layer. One side is complete.
13. Continue this process on the other side.

Your flower is complete!
Dont get down on yourself if it doesnt turn out great on the first try. And dont get disappointed when each flower comes out different no matter what you do. Some turn out good and some not so good, its just how it happens so roll with it :-)
No comments:
Post a Comment